Wednesday, September 16, 2015

Project Report: Prairie Beach Private Park: August 2015

I visited my old friend, the prairie beach park, in mid August 2015, about fifteen months after installation.  For reference, here is the post detailing the site and initial installation work, and the post about the site visit in Fall 2014.  To summarize my observations from the visit, the establishment of this novel ecosystem is a mixed bag of good and bad things happening.


If you compare the above photo with this photo from May 2014 and this from Fall 2014, you can easily observe the progression of prairie growth.  There remains much room for improvement.  Although many areas of the prairie are still thin, achieving denser growth is only be a matter of time!

First, the good, because I like to include pretty photos! 


The Quercus macrocarpa specimen seems to be losing a few branches.  But, considering it is still alive after all this time, I am sure the root system has continued to expand, and its continuous process of growth and death and regrowth appears to be off to a good start.


 Coreopsis tinctoria, Plains Coreopsis...sprouted from the annual seed mix.


A beautiful grasshopper specimen, hanging out on the flowers of a Eutrochium maculatum, (formerly Eupatorium maculatum), Joe Pye Weed... grown from a plug from Wildtype Nursery.


Two unidentified beetles doing their thing on Coreopsis lanceolata, Lance-leafed Coreopsis...sprouted from Native Connections Dry-Shortgrass prairie seed mix.


Bouteloua curtipendula, or Side-oats Grama, sprouted from Native Connections Dry-Shortgrass prairie seed mix.


This is a Liatris spp. (not L. cylindricea).  I also observed some specimens of probably Symphyotricum novae-angliae (formerly Aster novae-angliae).  These two species were not included in either seed mix.  So, both species were either here naturally or sneaky inclusions in the seed mixes, which, given how the seed mixes are collected and prepared, would not be surprising.  Both are native species, so both are most welcome!


Monarda punctata, more commonly called Horsemint, with its surprising flowers...sprouted from Native Connections Dry-Shortgrass prairie seed mix.


Helianthus occidentalis, more commonly called Western Sunflower...sprouted from Native Connections Dry-Shortgrass prairie seed mix.

The plugs from Asclepias syriaca and Rudbeckia hirta survived at such a high percentage, that you can basically see the line of where the plugs were planted.

Several native plants had significant populations.  Observing plants, which grew from seeds and plugs (which cost a good deal of money), now producing seeds (free!!!) and naturally spreading themselves over the prairie is highly satisfying!  I observed possibly significant populations of Asclepias syriacaCassia fasciculata, Coreopsis lanceolata, Coreopsis tinctoria, Elymus canadensis, Euthania graminifolia, Fragaria virginiana, Monarda punctata, Penstomon hirsutus, and Physostegia virginiana.  Only time will tell if these populations are viable and remain adequately competitive, but these seem to be off to a promising start.

Other species that I observed, which probably sprouted from the Native Connections Dry-Shortgrass prairie seed mix were Anemone cylindrica, Asclepias tuberosa, Bouteloua curtipendula, Bromus kalmii, Echinacia purpurea, Helianthus occidentalis, Lobelia cardinalis, Panicum virgatum, Rudbeckia hirta, Sporobolus heterolepis ...  I only observed one or a few specimens of these species.

Second, the bad.  I did not observe numerous species included in the Dry-Shortgrass Prairie Seed Mix.  Various explanations are probable.  One, I just missed seeing the species or did not identify it.  Two, their occurrence is noticeable in a different season then when I visited.  Or three, the germination conditions were not appropriate for the particular species.  Hopefully, these seeds remain part of the seed bank and, as conditions change, their successful germination becomes more likely.

Most surprisingly missing was, Schizachyrium scoparium, which was a large constituent of the mix.


Third, the super ugly!  Some non-native invasive species were taking advantage of the disturbed soil and, unfortunately, moving in.  I observed probably significant populations of Securigera varia or Crown-Vetch (probable ID, photo below), Eleagnus umbellata (mentioned in previous post), Queen Anne's Lace, and, possibly, Phragmites australis (probable ID, photo above).


I plan to provide recommendations to my client to manage these non-native species and to continue pushing the prairie in an ecologically beneficial direction.  Possible recommendations might include:
  • Mowing the prairie early Spring 2016 (especially the areas with Crown-Vetch and Autumn-Olive).  There is not adequate fuel for performing a thorough prescribed burn yet.
  • Removal or cutting and painting the Autumn-Olive.
  • Cutting/treating the Phragmites.
  • There are some other native species, which might like to compete in this space.  So, I might recommend planting those plugs or spreading those seeds.
  • Once the fuel-load is adequately dense, performing a prescribed burn.  After breaks are mowed, the actual burning would likely take just a few minutes.  If a burn is not possible, mowing annually or bi-annually.
Additional discussion needs to occur for deciding the best, most appropriate, course of action.

Tuesday, September 15, 2015

Project Report: Prairie Beach Park: Fall 2014

On a long trip from Boundary Waters Canoe Area Wilderness (I plan to write a botanical trip report someday) returning home to Ann Arbor, I stopped by the prairie beach park near Fenton, Michigan, in early September 2014.  I wanted to see how the prairie was growing after spreading seed and planting late Spring 2014.  Here is the post detailing the site and my installation work.

Questions I pondered before arriving:  did the shrubs and plugs from Wildtype take?  Did the Bur Oak sapling, which received an unknown regimen of additional watering, survive its transplant?  What species germinated from the seed mixes?  How vigorously did the prairie grow?


Well, initial observation was that the prairie growth was quite thin.  Not surprising given that seeds were only spread less than four months prior.  The ground was cracked due to the shrinking drying clay soil.  I observed many plants sprouting up from inside the cracks where some lucky seeds must have got caught in a good spot to germinate.


Upon closer inspection though, good things were happening.  From the annual mix, I saw Bachelor's Button (photograph above), Partridge Pea, Spurred Snapdragon, and Plains Coreopsis.  From the short-grass mix, I spotted Panicum virgatum, Symphyotricum laeve (formerly Aster laevis), Cassia fasciculata (this was in both the annual and Dry-Shortgrass-Mix), and, well, many unidentified plants consisting of basal leaves.


These basal leaves belong to a species, which will be identified soon.


Also, not yet identified.  Most native flowers require more than one full season of growth before producing flowers.  So, observing plants consisting of just basal leaves indicated a germinated seed, or in other words, a step in a good direction.  From the plugs, I also saw specimens of Asclepias syriaca, Physostegia virginiana, Rudbeckia hirta, and Eupatorium maculatum.


Although insects were already making use of the Euthania graminifolia, which was another planted plug, the desired plants seemed few and far between.  The Quercus macrocarpa and Cercis canadensis fortunately seemed to be sticking, as was the Ribes americanum shrub.  Very happy about that Burr Oak, which has a reputation for doing well in clay soil situations.


This area of the prairie was thick with Plains Coreopsis, so definitely some good things were happening.  As indicated in the previous post about this project, the most important component of establishing a prairie was patience, patience, and more patience.  The seeds have been sown and quite possibly will germinate some day.  I waited a year after visiting to write this post.  So, since I have now seen the prairie in late Summer 2015, I can safely say I feel a lot better about this project, .  Here is the post about that visit.

Project Report: Phases II and III of My Raised Bed Garden

The current heated temperatures belie this growing season is cruising towards a frosty date!  So, here is, better late then never, an update about my raised bed garden!  A report on phase I is discussed in a previous post.  Phase I was completed in July 2014.  I completed both phases II and III in late Fall 2014.  This update consists of numerous photos!

As this project was completed by one person, me, providing almost all the labor, performing the work in phases seemed most appropriate.


Above is a simple sketch showing the layout plan before I began construction.  This sketch does NOT relate that my yard is sloped!  Except for a few box size adjustments, the installed boxes follow the sketch.


Important to note, the phase I garden beds produced some excellent food during their shortened 2014 growing season.  Above, me harvesting a nice zucchini in late 2014.


A photo of the final zucchinis of our 2014 garden.  Some large zucchinis for bread and other miscellaneous recipes AND two single bite zucchinis...which disappeared in short order.


This photo shows the garden beds of phase I in late Fall and the three boxes of phase II completed and installed.  Also, I am applying the linseed oil preservative to one of the two boxes in phase III.


As designed in the sketch above, all the garden boxes have been completed and installed in late 2014.


A photo taken in January 2015.  Brrr!  Actually that would feel quite nice right now.


As at start of Spring 2015...


Our first radishes!


And a tasty strawberry.  We were able to transplant some strawberry plants into a box in late 2014.  They only produced a few during the 2015 spring, but we are really looking forward the 2016 spring harvest, as they have spread quite a bit!


Before the 2015 garden jungle...


Our garden exploded!


We had a visitor!  We lost a fair number of cherry tomatoes to its voracious appetite, but this Hornworm eventually disappeared. (Or he was so well camouflaged that we could not find him.)

Thursday, April 30, 2015

Project Report: Pinckney Town Hall Rain Garden Installation

The 2015 growing season is, well, pretty much here!  But before that explosion!, I am blogging about an awesome project that I helped with in 2014.  I provided a design for the rain garden in front of the Pinckney Town Hall.  The Pinckney Garden Club provided the hands on labor to install it, and will help maintain it on an ongoing basis. 

This project came up through my connection with Susan Bryan, the Rain Garden Coordinator in the Washtenaw County Resources office.  She knew that Ann Jarema, the president of the Pinckney Garden Club,  was thinking about the project. The location, in front of the Town Hall is obviously quite public, so we quickly recognized it as a demonstration garden and foresaw some possibilities for positive social influence.


Susan, Ann, and I met on a bright sunny mid April Friday afternoon for a site visit and discussed various layout options and, in the end, made some decisions.  Above is a picture of the site that day.  I went home and drew up a draft.  I provided a chance for feedback input, but Ann and Susan were mostly happy with the draft documentation.  Here is the finalized "infrastructure" plan view.


I also provided a planting plan.  As plants were coming from miscellaneous donated sources, and which particular plants and their quantities would be available on the volunteer day was unknown, I should have titled this a suggested planting plan. 


For those interested, the whole design documents are linked here.

We set an installation day of June 21st.  Village folks removed sod from the garden area beforehand, which saved the volunteers quite a bit of labor.  June 21st turned out to be a wonderfully sunny day! 


Photographic opportunities were plentiful, unfortunately, per usual, I was occupied.  I did snap a few process photos though, which are almost all included below.  Here, we are carefully removing sod unto a tarp to install the underground pipe carrying overflow from the rain barrel to the top of the rain garden.


Donated plants came from 3 Dog Nursery and from multiple gardeners of the Pinckney Garden Club.  Here is a photo where most of the main rain garden plants are in the ground.


In the following photo, you can see the rain garden is installed with a sign, the piping, the overflow pavers, the rain barrel base, and the rain barrel in place, and retaining wall is partially finished.  Shortly after the installation day, the building's gutter was altered to divert flow to the rain barrel and overflowing to rain garden.  The Pinckney Garden Club finished installing the retaining walls and gardens along the building.


It was a great day.  The local newspaper even did a nice write up.  Ann Jarema, the Pinckney Garden Club, and some Village folks continued working on the gardens to finish up the retaining walls and beds along the building, and complete hooking up the gutters.  I plan to snap a "year later" photo soonish.

This was the first rain garden I helped install after taking the, highly recommended, Washtenaw County Master Rain Garden program taught by Susan Bryan, and Shannan Gibb-Randall of Insite Design.  More information about that program and the rain garden effort in Washtenaw County can be found here.

This project experience fulfilled a requirement for me to be certified as a Master Rain Gardener. I am looking forward to building at least two (but hopefully more) rain gardens this coming season! Thank you for reading!

Wednesday, February 11, 2015

Project Report: Prairie Beach Park: Installation

A most interesting project started this past Spring 2014 on a half acre property on a lake near Fenton, Michigan.  The soil there, which largely consists of clay, unsurprisingly did not perk well.  Thus, with no where to dispose of sewage, the property is considered unbuildable.  My client and his family, whom live across the road from the lake, purchased the property for their own personal prairie beach park.

Prior to my involvement, a local landscaper had already installed hardscaping elements at the property, including a sand beach area, placing large boulders at the waters edge and around the beach area, and a couple concrete staircases leading down to the beach and dock.  The local landscaper also graded almost the entire property.


Unfortunately, the local landscaper did a few things differently than I would have.  First, although the large boulders may stabilize the shoreline, the land-water interface is typically where the most biodiversity occurs.  Preserving that land-water transition would have provided more ecosystem functionality.

Second, by "grading", the landscaper apparently simply removed all the top soil from the property.  What remained appeared to be probably parent material with few roots.


Third, the area close to the beach has a significant slope.  The local landscaper's grading work opened this surface up to erosion and did nothing to mitigate it.  Stabilizing the slope was a priority.  

To provide an overview of the property and work to be performed, I drew a landscape plan after performing my initial site visit and consultation.  The client provided some feedback affecting a couple changes.


To begin the long process of installing a prairie, I purchased two seed mixes from Native Connections.  The first seed mix, titled "Dry-Shortgrass-Prairie-Mix".


The second seed mix consisted of annual seeds.  Native forbs typically take two or three years growth before they start to bloom.  So, adding annuals provides some "show" before the real show of native flowers kicks in. 


I mixed the first seed mix with Milorganite to facilitate spreading with a spreader.  The Milorganite should also slightly replace the missing organic material in the soil.  To ensure adequate thorough coverage, I also spread the native seed mixture using both the spreader and throwing by hand.

For the annual seed mix, I spread by hand near by the path, beach, and patio area for the purposes of providing a close upfront display.  I also sparingly spread the annual seed mix in the background.


In addition to the seed mixes, I planted plugs of forbs and shrubs, and transplanted two B&B'ed Redbuds and a Burr Oak.  I selected the following native species based on site factors and availability from Wildtype.
  • Amorpha canescens, Leadplant (gallon container, 3 count)
  • Diervilla lonicera, Bush Honeysuckle (gallon container, 3 count)
  • Potentilla fruiticosa, Shrubby Cinquefoil (gallon container, 3 count)
  • Rudbeckia hirta, Black-eyed Susans (plugs, 38 count)
  • Asclepia syriaca, Common Milkweed (plugs, 38 count)
  • Penstomen hirsutus, Penstomen (plugs, 38 count)
  • Euthania graminifolia, Grass-Leaved Goldenrod, (plugs 38 count)
  • Mimulus ringens, Monkey-Flower, (plugs, 38 count)
  • Physostegia virginiana, Obedient Plant, (plugs, 38 count)
  • Eupatorium maculatum, Joe Pye Weed, (plugs, 38 count)
  • Ribes americanum, Wild Black Currant (gallon container, 3 count)
These forbs and shrubs were mostly focused on the sloped area near the beach to mitigate the erosion occurring there.


To someday hopefully provide a prominent feature of the property, I planted a Burr Oak, Quercus macrocarpa. I selected this species both because of its adaptability to poor clay soils but also because it seemed to fit into this planted oak savannah.  Digging the hole large enough to accommodate this planting in the clay soil was the opposite of easy!

In regards to future concerns, several Autumn Olive (Eleagnus umbellata) shrubs are growing on the property.  I recently watched a seminar by Douglass Tallamy, whom calls this species Ugly-Agnes.  In order to prevent these shrubs from overtaking over the prairie (and they will!), I recommend performing some invasive shrub removal during a coming late fall/winter.

Once fully grown, the prairie beach park will help protect the water quality of the lake.  Especially so when compared to many other lakeside properties which have lawn right down to the shore line.  Surface runoff from the prairie should be well filtered and refresh the lake, whereas runoff from lawns often carries fertilizer and pesticides.

Possibly the most important quality to exhibit when starting a prairie from scratch (and mostly seed)  is patience.  Jerry Stewart of Native Connections emphasized that the seeds are there, but just may take awhile to germinate and flourish.  

Definitely stay tuned for the past due update.  All links to update posts will be added here, once said posts are written!  EDIT:  Here is the post describing the park in Fall 2014.  Here is the post describing the park in August 2015.

Thursday, November 13, 2014

Project Report: Phase I of My Raised Garden Beds and Lumber Preservation Experiment

Being a new yard owner, I am undertaking the long, yet rewarding journey converting the existing contemporary landscape of lawn and non-native ornamental plants into a place more ecologically useful.  One of my first tasks was to increase the yard's production of human food (most decidedly not critter food, although some critters have already capitalized on the opportunity).  Of all the open lawn real estate in my yard, the west side yard, below, seemed most ideal for a garden with exposure to the afternoon, evening sun.


As this area has a fair slope, I decided raised garden beds would help mitigate runoff erosion.  The west side yard doubles as a front yard facing the street thanks to a curve.  So, aesthetics are, of course, key.

A variety of material options and construction methods are available for constructing a raised garden.  Rocks or bricks/blocks hold an advantage over lumber by simply not decaying.  I, personally, am more comfortable constructing with lumber.

Another material category, treated lumber, is used often in raised gardens.  The lumber industry claims that the chemical preservatives used to treat the lumber will only negligibly leak into surrounding soil and that treated lumber is safe for use in raised gardens.  I chose not to trust those claims.  I want the vegetables coming out of my garden to be healthy!

My initial instinct was to use untreated cedar lumber, with its inherent abilities to withstand biological decay and the corresponding longevity.  However, cedar costs about three times as much as untreated pine lumber.  Thus, if I wanted, I could rebuild the raised garden bed three times with pine at the same lumber costs as once with cedar.

So, I started looking into organic wood preservatives that might lengthen the life of untreated lumber.  Local hardware stores carried a few options, but those products seemed to only came in small pricey quantities.  I came across a few mentions online of using linseed oil as a wood preservative.  Linseed oil actually comes from flax seeds, which I occasionally eat!

Distinguishing between raw linseed oil and boiled linseed oil, which is on the shelf at most local hardware stores, is critical.  "Boiled" actually indicates additives, including petroleum spirits and metallic dryers, which are not organic.  I was unable to find raw linseed oil locally, so I purchased from an online source.


I also came across recipes that apparently improve drying and penetration into the lumber.  However, these recipes included ingredients that I do not care to eat!  So, I decided to use plain old raw linseed oil as my preservative.


Perhaps most importantly to note, oxidation of linseed oil is an exothermic chemical reaction.  Rags soaked in linseed oil can spontaneously combust.  To avoid this fire hazard, rags and gloves should be stored in closed container and left away from other flammable material.

I purchased 2" by 6" White Pine lumber for the face boards and 3" by 3" Cedar for corner framing; for fastening; a box of stainless steel screws.  I purchased the lumber and screws from my local Home Depot. 


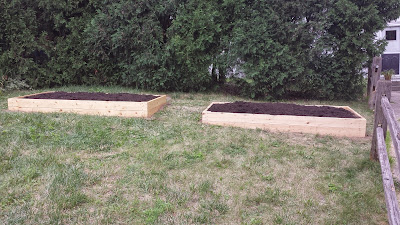
For Phase I of my raised garden bed project, I constructed two 4' by 8' lumber boxes.  The closer box has one coat of oil.  After allowing a few days for drying, I applied a second coat.  I did not apply any linseed oil to the other box.  And thus, this is my own personal lumber preservation experiment to see whether the raw linseed oil actually makes a difference in aesthetics and durability.  In regards to aesthetics, the above picture shows that applying the oil darkened (or yellowed) the wood and seemed to bring out the grain of the wood.

The slope of the side yard is downhill both from left to right and from the shrubs to the sidewalk.  I removed the sod and dug trenches such that the box would sit mostly level in the ground.  I used a 4' level tool to double check their level, because looking at the ground and other points of reference was little help.  The boards pull a double duty of retaining the garden soil and, being partially buried, act as border edging, blocking lawn grass roots from growing into the garden (potentially reducing weeding maintenance).


And finally, I filled the boxes with a cubic yard of compost from the City of Ann Arbor Drop Off Station.  Phase I installation, photographed above and below, was completed in late July 2014.  The left far box is treated; the right close box, untreated.


EDIT:  Phases II and III of the raised garden bed project are detailed here.  A follow up post for the lumber preservation experiment remains in the works.

Saturday, August 2, 2014

May 2014 Trip to the Nan Weston Nature Preserve at Sharon Hollow

So many wildflowers...so little battery life on my camera and phone (also a camera).  Maria and I exhausted the batteries on both cameras taking over two hundred photos during a brief hike through the Nan Weston Nature Preserve at Sharon Hollow on a mid May Sunday afternoon.  The Nature Conservancy established and helps to protect the Preserve, and what a place it is!  A short hike through the preserve is like taking a walk back to what the Michigan landscape used to be.  Following are a handful of my favorite photos and species of the day.

This photo is of potential.  Showing one of numerous Wild Gooseberry shrubs in the woods of Nan Weston Preserve.  I would certainly like to visit when the uncountable gooseberries ripen and carefully steal a few sweet tastes from the prickly treasures.  According to Gleason's Plants of Michigan, there are eight species in the Ribes genus in Michigan.  Keying this particular shrub, my best guess is this is Ribes cynosbati in the Grossulariaceae family due mostly to the location in deciduous woods.

 
My favorite groundcover, Asarum canadense, in the Aristolochiaceae family, was found over much of the Preserve.  This photo shows all of both leaves and the flower below.  If you do not specifically look for the flowers in May, they are easily missed.

I included this photo to give you a sense of the uncountable wildflowers covering the forest floor.  Keep in mind that this photo is only in one direction.  A panoramic view of all the wildflowers might be too much for your computer!

This photo shows two buddies for the season. On the left, Trillium grandiflorum, in the Lilliaceae family.  On the right is Hydrastis canadensis in the Ranunculaceae family.  The Common Trillium carpeted the landscape, while the Goldenseal is more subtle beauty (and also rarer).

Another combination photo showing Maianthemum racemosum or False Solomon's Seal in the Asparagaceae family (on the left), Phlox divaricata or Wild Blue Phlox in the Polemoniaceae family (middle low), and Common Trillium (top right).   Let's just say there were many opportunities for combination photos.

A photo, of hope and newness, the small, young leaf of Podophyllum peltatum in the Berbidericeae family.  Of the many photos we took of this relatively common species, this is the one I decided to share.

Though violets are considered to be a weed by some, the blue, the white and this Yellow Violet, Viola pubescens in the Violaceae family, seemed to fit right into the amazing landscape.

The beautiful flower of Panax quinquefolius of the Araliaceae family, also otherwise known as Ginseng.  This panicle flower should turn into a panicle of red drupes some day. 

Here was the super small, subtle flowers of Bishop's Cap, Mitella diphylla in the Saxifragaceae family. 

I wanted to include a couple photos of newly emerging leaves of Fagus grandifolius in the Fagaceae family.  There is something about the flow of lines as these leaves emerge that makes more perfect sense then just about any human design ever.  This perfect design was commonplace, on the end of every branch of every American Beech in the woods.  So, if you are looking for design inspiration...


Lastly, know that these brief words and pictures fall very short of fully describing the beauty and peacefulness of the Preserve.  I discluded several startling photos simply because I lacked confident identifications!  Please visit the place yourself and feel free to share the experience with me.